Spring Bathroom Refresh Checklist: Easy Updates to Pair With a One
Welcome Spring with a Bathroom That Feels Brand-New
A bathroom can start to feel tired long before anything is actually broken. Grout gets dingy, lights feel dim, and that old tub is just harder and harder to keep clean. Spring is a perfect time to reset the space, clear out the clutter, and give yourself a room that feels fresh again.
You do not need a full remodel to get there. With a smart plan, you can pair a one-day bathtub installation with simple updates to fixtures, lighting, ventilation, and caulk or grout. These changes cause very little disruption, but they make the whole room feel new. Our goal is to help homeowners in New Hampshire, Southern Maine, and Northern Massachusetts focus on high-impact upgrades that fit into a busy weekend and work smoothly with a fast tub project.
Plan a One-Day Tub Upgrade That Fits Your Spring Schedule
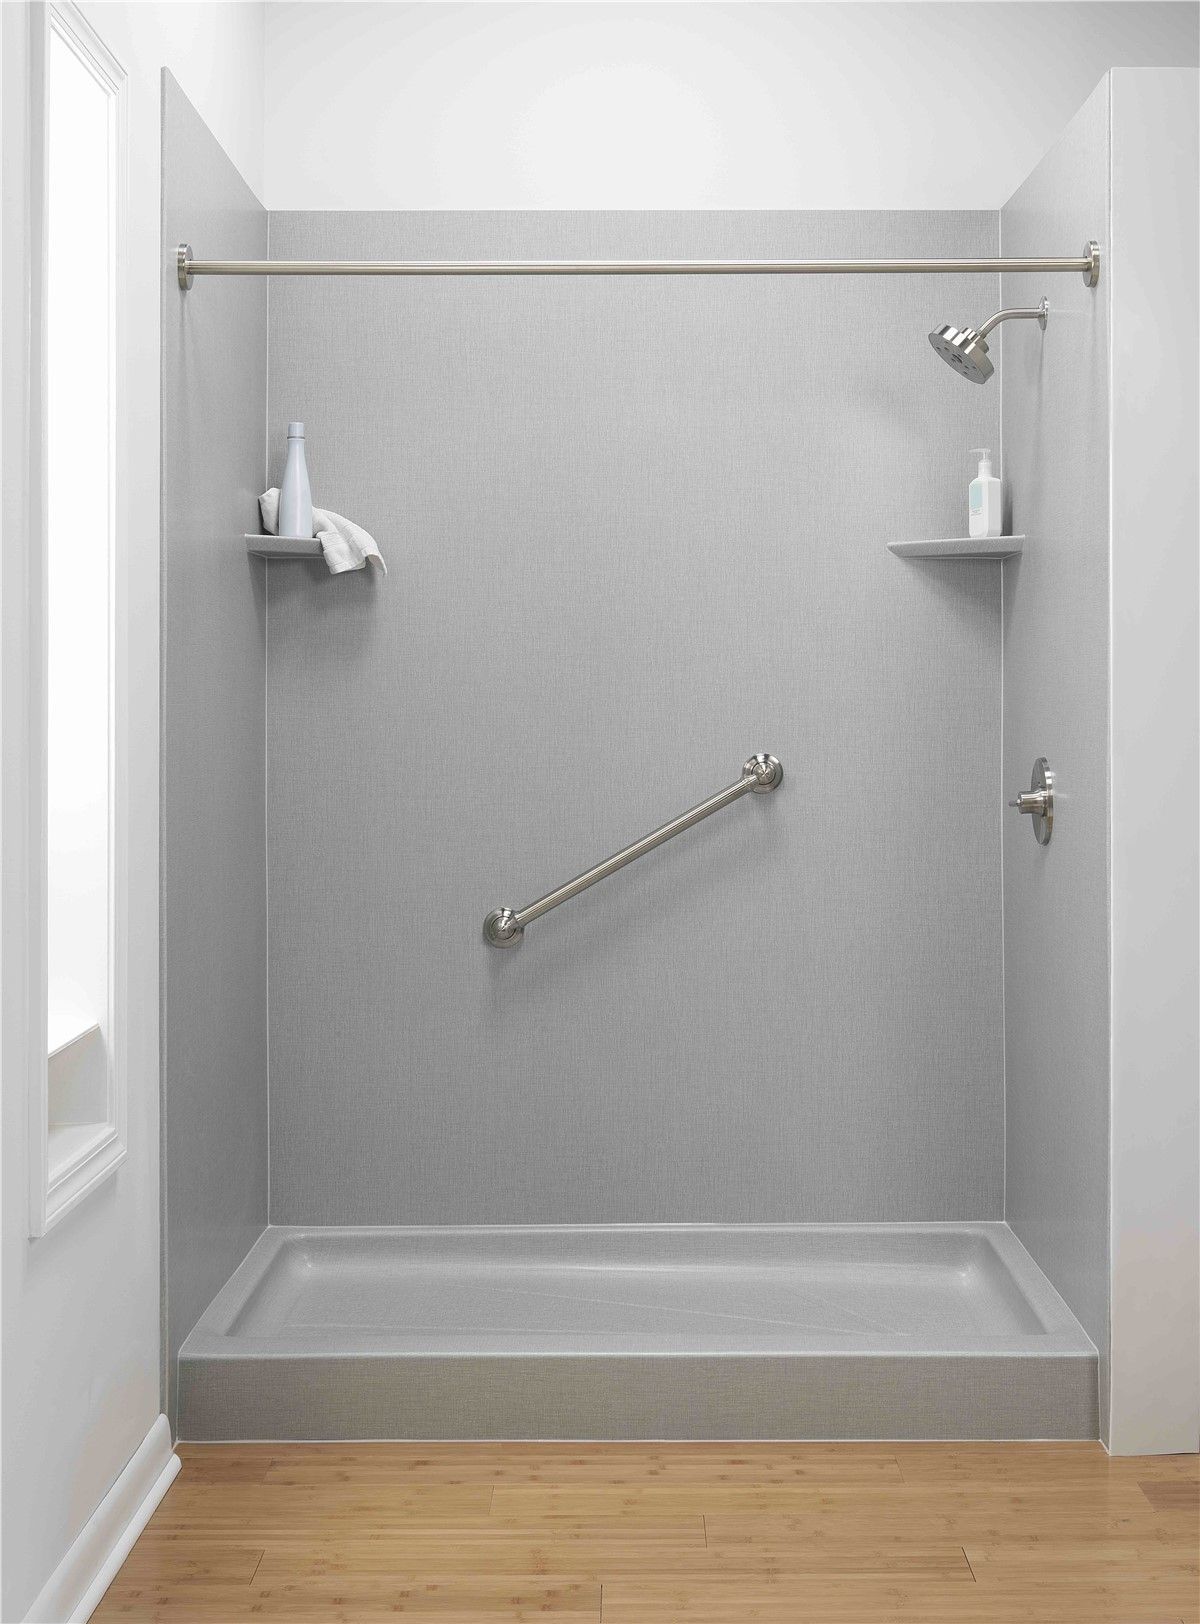
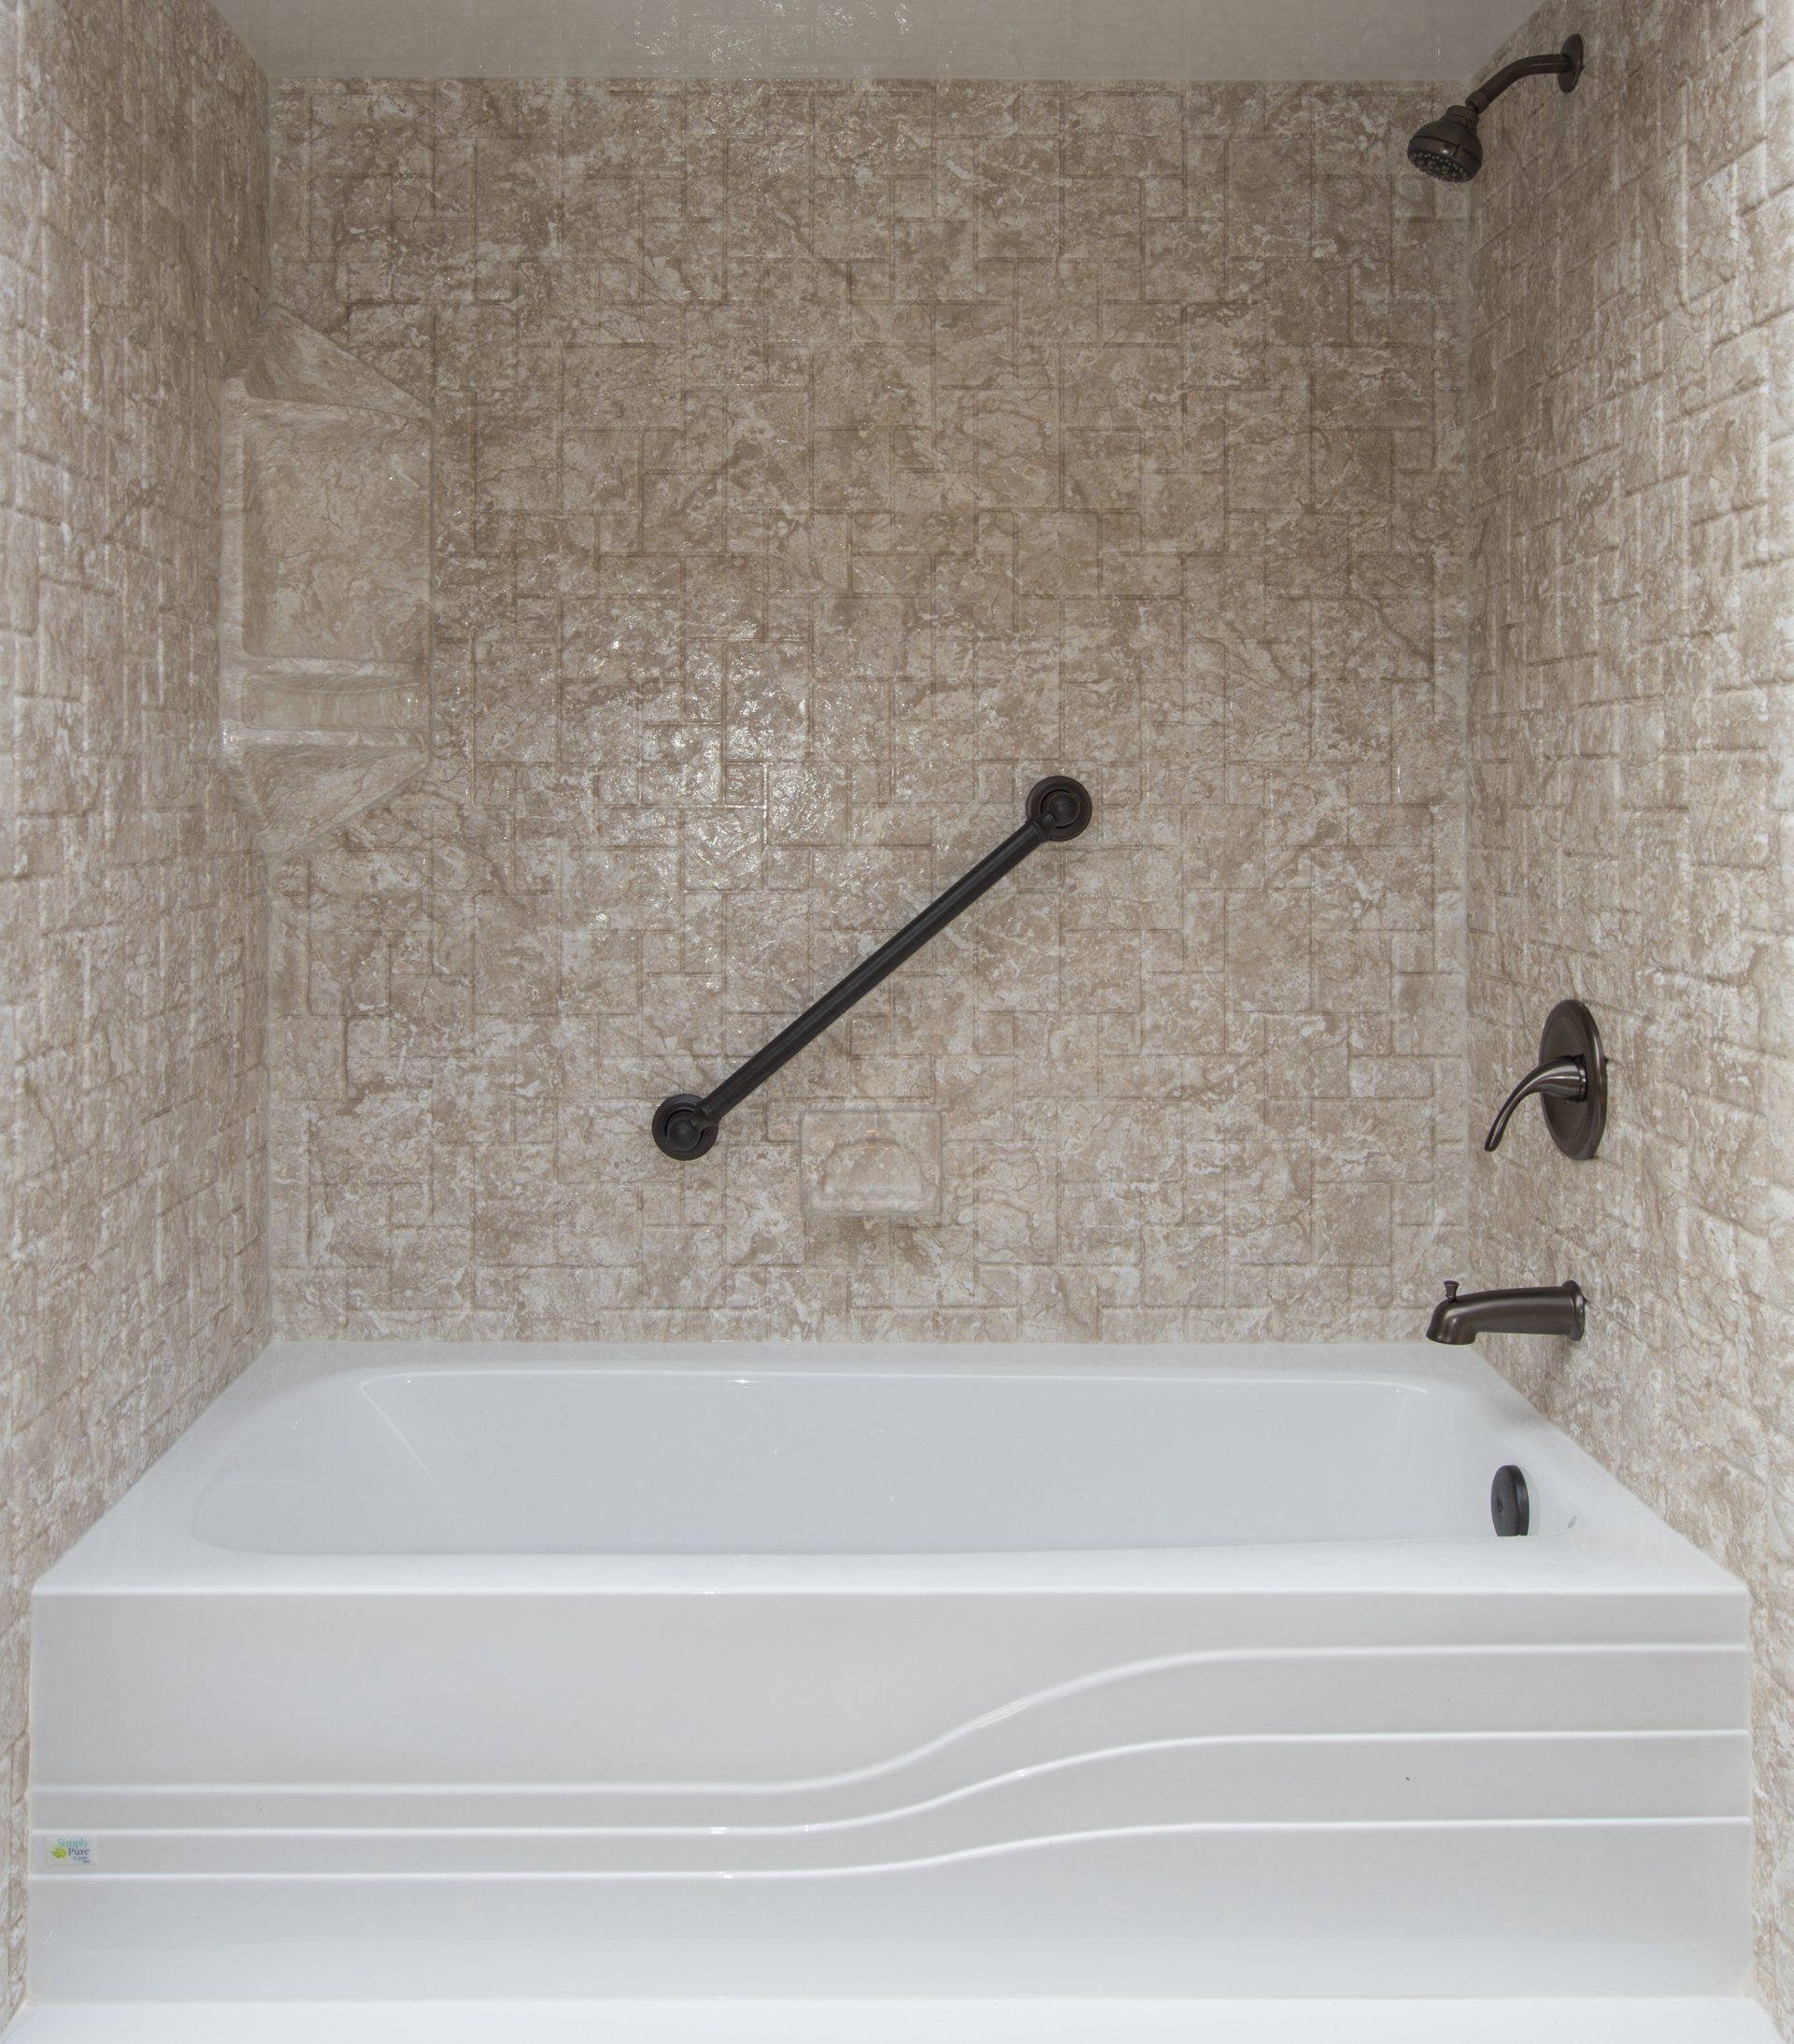
A one-day bathtub installation is all about speed and control. In most homes, this includes removing the old tub, putting in a new bathtub or walk-in tub, installing a new wall surround, and sealing everything so the area is ready for same- or next-day use. The work is focused on the tub and shower zone, so the rest of your bathroom can stay mostly untouched.
Spring often works well for this kind of project. The weather is milder, so it is easier to air out dust and odors with open windows. It is also usually a calmer time than summer travel season or late-year holidays, which means less stress if the bathroom is off-limits for a short time.
Before you schedule, take a little time to plan:
- Measure the tub area and note doorways and tight corners
- Make a list of pain points, like slippery surfaces or high tub walls
- Decide if you want a standard tub, walk-in tub, or walk-in shower
- Think about features like slip-resistant floors, low thresholds, and easy-clean walls
Once you know what you want, work with a professional installer to confirm the scope and timing. Ask what you should do before the crew arrives, such as:
- Clearing personal items from the tub, shower, and nearby shelves
- Making a clear path from the entrance to the bathroom
- Pre-selecting finishes and colors so there are no last-minute delays
Lining up these details ahead of time keeps your one-day bathtub installation on track and leaves you free to focus on the fun refresh steps.
Easy Fixture Swaps That Deliver Big Visual Impact
When the new tub or shower is in, your fixtures do a lot of the visual heavy lifting. Old faucets, worn tub fillers, and basic showerheads can make even a brand-new surround feel less special, while updated fixtures can tie the whole room together.
Start by choosing finishes that match or blend with the new tub walls. Popular options include:
- Brushed nickel for a soft, classic look
- Matte black for bold, modern contrast
- Chrome for a bright, clean, traditional feel
Try to carry that same finish across:
- Sink faucets
- Cabinet pulls and knobs
- Towel bars and hooks
- Even door handles, if you want a full refresh
Spring is also a good time to think about comfort and ease of use. Many homeowners like:
- Water-efficient showerheads that still give a full, relaxing spray
- Lever handles that are easier for kids, older adults, and anyone with limited grip strength
- Handshowers that make cleaning the tub and helping with bathing, much simpler
To keep things smooth with your one-day bathtub installation, check that any fixtures you pick are compatible with the new system. Coordinate finishes before installation day so trim kits and controls match what you have in mind. It also helps to know where shutoff valves are, in case the plumber or installer needs quick access for minor adjustments.
Light and Air Updates for a Fresher, Safer Bathroom
Once your tub area looks new, the next step is to make sure the room feels bright and fresh. Good lighting can make a small bathroom feel larger and cleaner, while poor lighting can hide problems and make simple tasks harder.
Think in layers:
- Overhead lighting for general brightness
- Vanity lighting at face level for shaving, makeup, and daily routines
- Optional accent lighting in niches, above the shower, or under cabinets
Warm-to-neutral LED bulbs keep the room feeling inviting, not harsh. In wet areas, look for fixtures rated for use over tubs and showers. A dimmer switch is a nice touch if you enjoy soaking at night or need soft light for late bathroom trips.
Airflow matters just as much as light. A strong, quiet exhaust fan helps pull moisture out of the room. That protects your new caulk and grout, and it helps fight mold and mildew, which is especially helpful as New England humidity rises.
Here are simple steps to refresh bathroom ventilation:
- Remove and clean the fan cover or replace it if it is yellowed or cracked
- Check that the fan vents to the outside, not into the attic
- Consider a higher-CFM, quiet fan with a timer or humidity sensor
- Plan any ceiling repairs or paint touch-ups before or right after tub installation
Coordinating fan work with your tub project keeps the ceiling clean and avoids extra trips up and down ladders later.
Seal the Deal with Fresh Caulk and Grout
After a long winter of hot showers, temperature swings, and tracked-in salt, your bathroom seals take a beating. Spring is a smart time to go over every edge and line so your new tub area stays watertight and sharp-looking.
Do a simple inspection:
- Look around the tub and shower corners
- Check where the tub or shower meets the floor
- Scan along the floor perimeter and around the toilet base
- Look at the joint where the vanity meets the wall or backsplash
You are mainly watching for cracks, gaps, peeling, or dark spots that suggest mildew. It also helps to know the difference between caulk and grout. Caulk is flexible and used where two surfaces meet or move a little, such as tub-to-wall joints and corners. Grout is rigid and fills the spaces between tiles for strength and water resistance across the whole surface.
When you combine this with a one-day bathtub installation, let the pros handle all sealing inside the new tub and surround. They know what products and techniques work best for those key joints. After they finish, you can focus on nearby details like baseboards, the edge of the vanity, or small gaps in floor tile. Those little touches make the whole room look finished and pulled together.
Make Your Spring Bathroom Refresh Happen in One Weekend
Pulling everything together is easier if you think of your refresh as a simple weekend plan. The idea is to let professionals handle the big piece, your one-day bathtub installation, while you tackle smaller updates around it.
A sample schedule could look like this:
Day 1:
- Morning and afternoon: tub installation, new surround, sealing, and cleanup
- Evening: check lighting, fan, and ceiling for any changes you want to make
Day 2:
- Swap or adjust fixtures if needed
- Update or service the exhaust fan
- Refresh caulk and grout outside the new tub area
- Put back only what you love, fresh towels, simple decor, and daily essentials
By the end of the weekend, you have a bathroom that feels clean, bright, and easy to live with, without the stress of a long remodel. For homeowners across New Hampshire, Southern Maine, and Northern Massachusetts, pairing a one-day bathtub installation with these low-disruption updates is a practical way to get a space that feels like a fresh start every single day.
Transform Your Bathroom With a Fast, Hassle-Free Upgrade Today
If you are ready to enjoy a refreshed tub without weeks of disruption, our
one-day bathtub installation is designed to fit your schedule and budget. At Cloud 9 Tubs, we handle everything from removal to cleanup so you can get back to normal life quickly. Tell us about your project and we will walk you through options, pricing, and timing. To schedule your in-home consultation or ask questions, simply
contact us today.
Blog